


Living in the digital age has certainly come with its share of perks for homeowners looking to sell and landlords looking to list their rental. However, homeowners and landlords alike will attest to the urgency of a perfect online listing. With prospective buyers and renters having the internet at their fingertips, it can feel harder to stand out and generate interest.
This is why featuring great listing photos has become an imperative task in the current market. Sellers and property managers alike need to utilize all the tools possible to create an aesthetically appealing listing, with photography that fully highlights the property’s best features.
If you don’t have the funds to hire a professional, all is not lost, however. Modern technology, a little bit of practice, and some proper planning can land you listing photos that will still turn the eye of prospective buyers and tenants.
Check Your Camera Settings
If you decide to DIY your listing photos, before doing anything else, be certain that you understand your camera well. First and foremost, verify that your camera of choice truly has the technology to sufficiently capture your property.
Using an outdated or a low-end camera can cause blurry or grainy images, and poor images not only fail to highlight your property’s best features, they convey a sense of apathy toward your listing, a considerable deterrent to a potential tenant or buyer.
You certainly don’t need to purchase the finest equipment money can buy, many new cell phones have the capacity to take great images with the right planning. If you use a new smartphone or iphone, be sure to change your settings beforehand. Ensure that your camera’s files are not being compressed for storage on your device, and play around with the light settings to find the best representation of what your eyes see in the room.
Shoot Different Angles:
Shoot from an area where you get the most view of the room, and don’t be afraid to shoot from different angles to find the best one. Be aware that a smaller room can tend to look claustrophobic if the perfect angle isn’t found.
For instance, taking your photograph from a far corner rather than an adjacent wall will make the room appear larger. Avoid highlighting anything large in the foreground that may stop the eye and distort the feeling of a full room (couches or chairs can often be the culprits here so stage them for the photo, not for everyday convenience.) Shoot from a stool or small ladder to stand higher than indoor pieces of furniture like beds and couches so they do not appear to take up the wall space.
Avoid Cropping:
Ideally, if you shoot in the manner above, you won't need to crop your images. Cropping your file--and digitally zooming on a camera or phone-- can harm the integrity of your image if you need it a higher resolution for print or web. Best practices are to stage the area beforehand to avoid the need for a crop altogether. If you find that you absolutely must crop your image, be certain you are cropping in the original image proportions and are cropping only what is absolutely necessary.
Use Natural Light Indoors:
Take your photos in the daytime when you have a lot of natural light to work with; open all the curtains, and even doors to make sure your room is as light as possible before taking your picture. If the light streaming in is harsh, use sheer white curtains as window treatments, and keep these curtains closed. This will diffuse the light creating a nice illumination throughout the room. If you are photographing on a cloudy day, be sure to adjust the "white balance" on your camera, this can prevent against a cold blue hue in the photo.
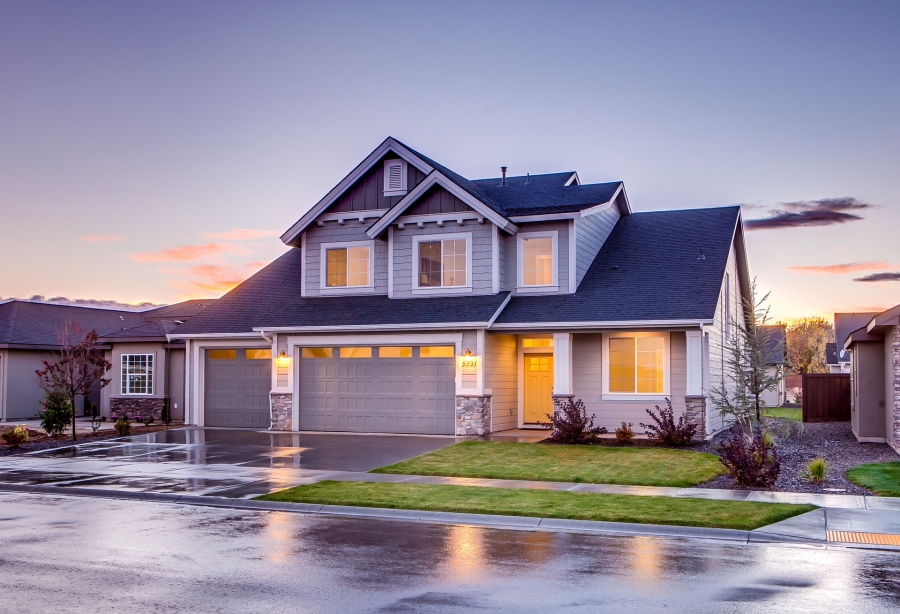
Take Some Outdoor Photos at Dusk:
There's nothing more inviting than a glowing home at dusk. For a frontal shot of the home, open curtains and turn on lights for any rooms that feature a window facing the front of the property. Additionally, turn on any porch or patio lights, as well as, walkway and path lights. Take a photo of the property as the sun is setting to emphasize the home's warmth and appeal. This photo may require a tripod to avoid a blurry image, but is well worth the effort.
When in Doubt, Hire Out:
DIYing can give you great satisfaction as you learn a new skill and save your funds, but there are always instances when it’s simply more reasonable to seek a professional. Afterall, a professional will always have skills equipment and knowledge that a DIYer will be hard-pressed to replicate. If your photos are not comparing with other listings in your area, it may be a wise financial decision to hire a professional. A picture says a thousand words, after all, and a poor images can cause the loss of leads and a loss of revenue far greater than the cost of a few hours of photography.
The next time you need listing photos, don’t hesitate to do what it takes to include high quality photography. Whether you decide to follow these simple tricks, or you decide to hire a pro, you’ll know precisely how to display your listing in the best light possible–no pun intended.