


Each self-builder has unique objectives and expectations for the outcome of their intended project. When building a new home, it’s a critical step to ensure that your vision becomes a reality by following the necessary building steps, which can be complex and demanding at certain times.
If you're constructing a starter home or a dream home, keep in mind that new home construction is fraught with unknowns and can be overwhelming—all the more so if you're unsure where to begin or run into a planning snag. The construction of a new home can take between three months and more than a year, depending on the square footage, environmental conditions, and availability of workers and supplies.
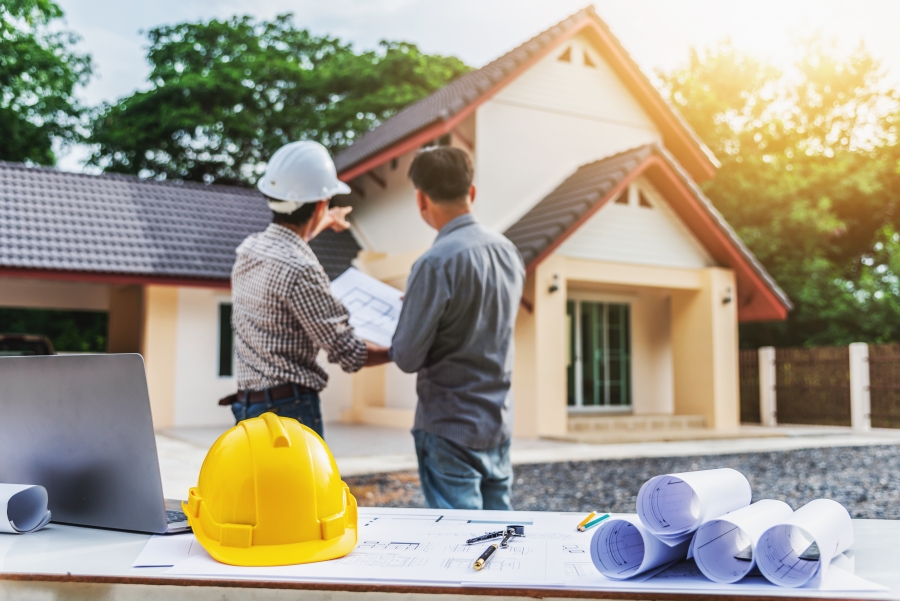
When you're building a home, learning the ins and outs of the process will allow you to stay on track and adhere to the timetable you’ve set. Here are the construction stages you need to know so you're aware of what to expect:
1. Pre-Construction
Before developing your construction schedule, some preliminary work is needed. Then, you can either do the job by yourself or hand it over to professionals like Kimball Construction that can complete everything from the first until the last steps of building a home. To begin, you'll need to locate and purchase a lot, hire an architect to create house plans, secure all the necessary building permits, hire a contractor (if you wish to use one), and take out a home construction loan if needed.
Once you've purchased the land on which you'll be building, you can begin calculating your budget and designing your house plan (either chosen or customized). Before laying the first slab, the initial planning and preparation phases must be completed. Now is the time to determine what you require and want. If you wish to have space for a pool or a double garage, you should think about this now rather than later.
Additionally, you'll need to address zoning codes and site planning. Before you begin construction on your new house, double-check that it complies with all applicable zoning laws in your state.
Pre-construction can take a considerable amount of time. Obtaining the necessary building permits can take up to a month, and finding the right contractor can take even longer. Finally, after the preliminary work is finished, the real work starts.
2. Excavate The Site And Pour The Base
By excavating your site, you'll be able to set your objectives, lay out a plan, and determine the ideal location to build your home within the land. Afterward, clear the debris from the construction site and set it aside at least 25 ft away from the planned house's perimeter to give you a clean site to work on.
A surveyor stakes out the lot with the original plot sketches depicting the property's boundaries. If necessary, alter the site's topography to control the flow of water through it; this would entail using earth-moving equipment from a contractor.
This transition can take between one and four weeks, depending on the complexity of the house layout and whether construction in one area limits access to other areas, but it’s usually straightforward. The floor plan of the house can be established using footings that act as guide rails. The bedrock provides structural support for the underground wall.
Concrete or similar material is poured into a mold within the cleared soil of the footings. It should be elevated enough to hold water away from the house. A hole is drilled into the concrete to accommodate any utilities or power lines, and the pipes are then fed in and resealed.
The foundations of a structure are essential and legally required components. They keep the form of the structure intact and prevent warping and expansion in certain terrains. A structural engineer is responsible for designing the foundations of a building to ensure that it’s protected from moisture and termites.
Additionally, waterproofing that extends approximately 100 mm above the soil level and ventilation for sub-floor spaces are necessary foundation features.
Waterproofing is essential since most walls are built using excavation and backfill techniques. Following construction, the surrounding soil must often be refilled to a height more significant than a portion of the foundation's height, or the foundation will sink below the soil/water level. Water is effectively sealed below and above the surface with the installation a waterproofing membrane, preventing the porous underside from absorbing additional moisture.
3. Complete The Rough Framing
At this point, the floor, wall, and roof foundations have all been completed (collectively known as the shell or skeleton of the house). Next, the exterior walls and roof are sheathed in plywood or oriented strand board (OSB), and windows and exterior doors are mounted.
After that, the sheathing is wrapped in a protective membrane called house wrap, which resists water while allowing water vapor to escape. As a result, mold and wood rot are less likely.
Although the interior walls won’t be constructed until later, you’ll be able to walk around the space and get a feel for it. The critical stumbling block during this stage is inclement weather, but fortunately, that’s the only one. The term 'drying in' refers to the stage of the framing process at which construction will begin regardless of weather conditions.
4. Finish The Rough-Ins For Plumbing, Electrical, And Air-Conditioning Systems
Once the previous step has been taken care of, siding and roofing can be added. At the same time, electricians and plumbers will begin running pipes and wires through the interior walls, ceilings, and floors. Next, sewer and vent lines as well as water supply lines for each fixture are installed. At this stage, bathtubs and one-piece shower/tub combos are set in place to facilitate the movement of huge, heavy items.
Ductwork is used to mount the boiler and the heating, ventilation, and air conditioning (HVAC) system. The HVAC system's vent pipes are mounted on the roof, and all of the floors, walls, and ceilings are insulated.
5. Insulate To The Maximum Extent Possible
Insulation is critical for maintaining a healthy, consistent indoor environment and substantially increasing a home's energy efficiency. In addition, it’s important to check the thermal quality, or R-value, of insulation since it indicates how effectively the material can prevent heat transfer. Insulation is installed in most exterior walls, the attic, and any flooring above unfinished basements or crawl spaces.
Fiberglass, cellulose, and foam are the most frequently used forms of insulation in new homes. However, your contractor can also use mineral wool (also known as rock wool or slag wool), concrete blocks, foam board or rigid foam, insulating concrete types (ICFs), sprayed foam, and structural insulated panels (SIPs), depending on the area and environment.
6. Complete The Utilities
Install any necessary additional utilities. If you've completed the installation of flooring and general fixtures, you can now hire a plumber to handle the entire plumbing system for you. After the plumber finishes the initial setup, it’s the electrician’s turn to manage any subsequent installations. The electrician will then link any remaining features such as air conditioning, lighting, power outlets, and appliances to the electrical grid.
If you're building a water retention structure on your property, such as a water tank, waterproofing is critical to ensure that it functions properly.
7. Add The Final Touches
There might still be a few tasks to do, but work has officially ended. A driveway can be built after most of the construction equipment has been removed, which means you'll need to clear it away quickly.
Additionally, now is the optimal time to begin landscaping. Even if you're using pre-grown plants and rolled-out turf, this can be a tedious process, so get started as soon as possible. Enhancing a balcony with features such as a louvered or opening roof increases the financial value of your property and creates a pleasant outdoor space.
8. Post-Construction
You can enjoy your completed home before the final stages of building can commence. First, however, don't forget to protect it from the elements. Certain areas should be inspected for potential problems, from the roof to the window frames.
On the roof, look for loose or broken tiles, raised flashing, and clogged or rusted gutters to determine whether there are any leaks. It's a good idea to have your attic inspected along with your roof since any roof gaps would be noticeable in your attic.
Verify that the gutters and downpipes are still safely connected to the stormwater system. If they’re clogged with dirt, clean them out. If the weather is dry, testing on a rainy day can be helpful because you’ll immediately see if there’s blockage.
Leaks in the plumbing system will cause warping, rot, and discoloration of the walls and floors. Plumbing leaks can be caused by an improperly waterproofed basement, showers, toilets, and leaking pipes in kitchens and bathrooms.
Examine the walls for algae and mold and broken pointing between the bricks as these are indications of leakage that may result in more severe problems. Where appropriate, replace or repair.
Once the entire house has been built, the remaining responsibilities include:
- Finalizing payments or loans
- Furnishing the interior of the house to make it your own
Takeaway
Are you still interested in pursuing home construction after having a better understanding of the process? It’s an excellent way to obtain a truly unique house if you're open to a flexible timetable and unpredictable yet fulfilling tasks. Once you've accomplished all these steps, you'll be able to relax in the comforts of your new home.